

If you’re looking for a delightful treat to celebrate Easter, look no further than these Easter Egg Oreo Cookie Balls. I’ve made these little delights several times, especially with my kids, who love getting their hands sticky with the melted chocolate. Each batch turned out wonderfully, filled with fun and laughter. Not only are these treats easy to whip up, but they’re also a perfect way to get everyone involved in the kitchen while creating lasting memories. For another fun Easter-themed recipe, check out my Easy Easter Birds Nest Cookies.
About Easter Egg Oreo Cookie Balls
Easter Egg Oreo Cookie Balls are a delightful spin on the traditional dessert, perfect for spring celebrations. I discovered this recipe during countless testing sessions to create a festive treat that kids and adults alike would enjoy. The ease of preparation adds to its charm, making it a family favorite. Plus, you can easily adjust flavors by using different types of Oreos or candy coatings, ensuring it suits various tastes and occasions.
- Quick prep: Ready in about three hours.
- Budget-friendly: Uses simple ingredients available at most supermarkets.
- Family favorite: Engaging to make with children, sparking creativity.
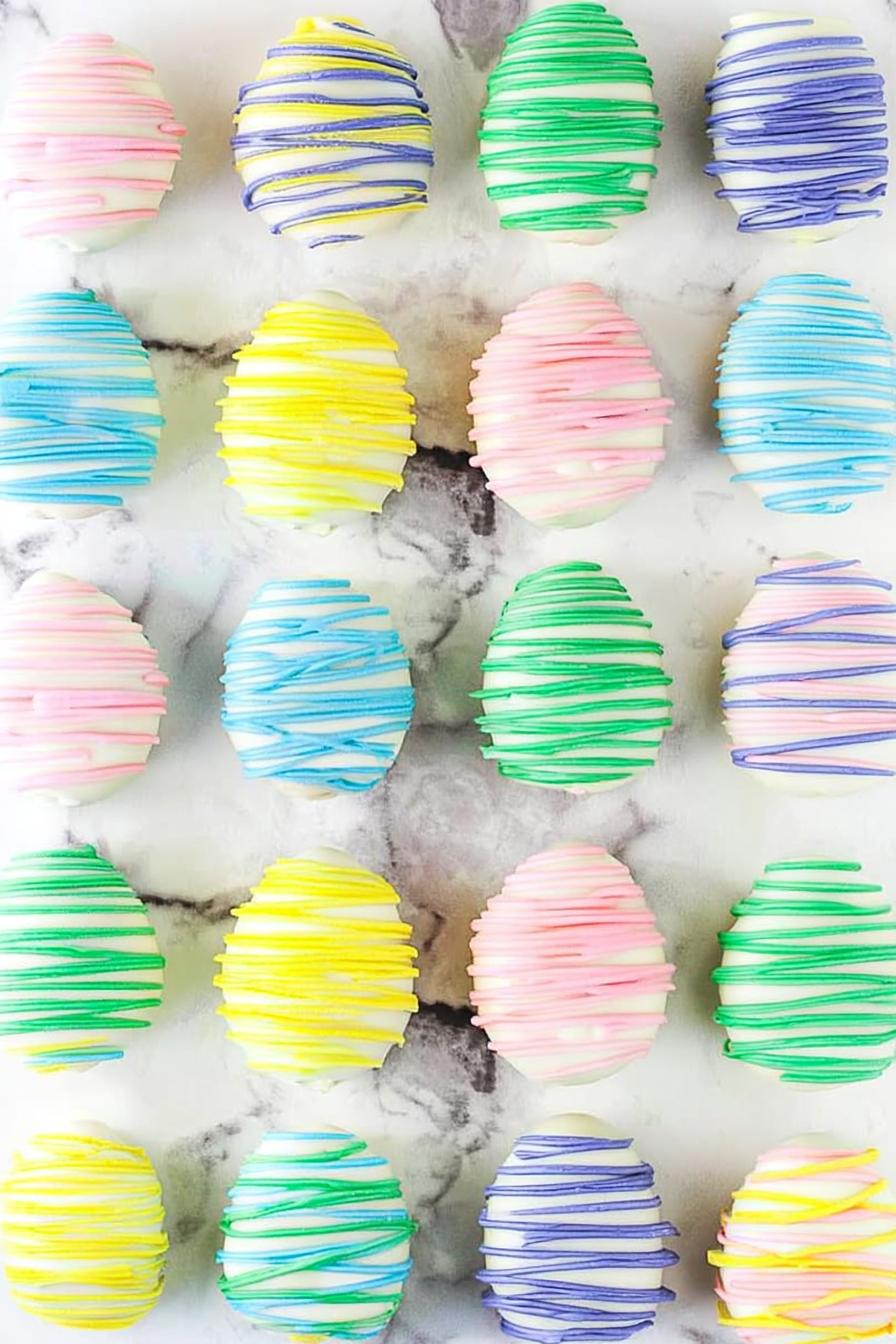
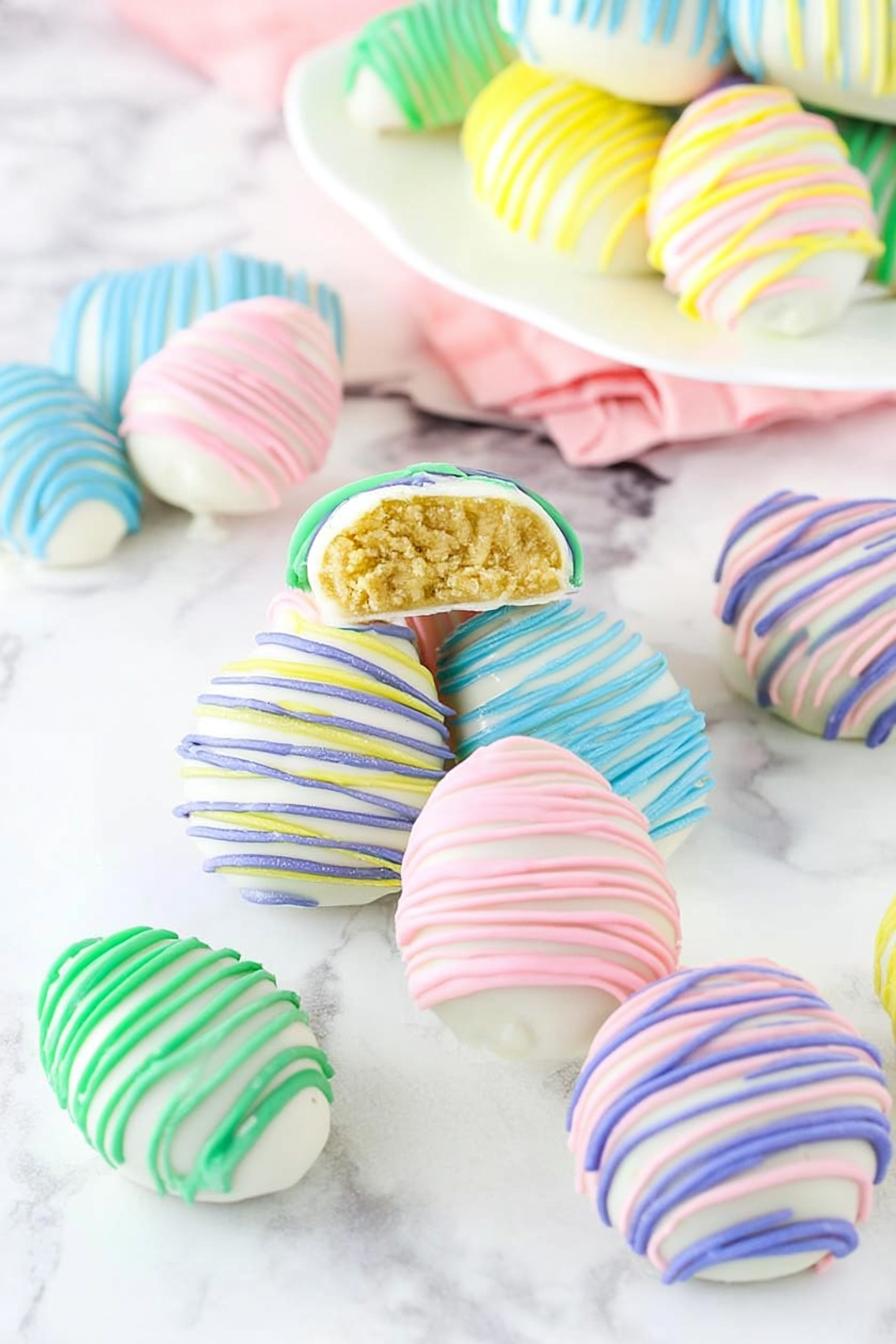
- Fun fact: The use of white candy coating allows for colorful decorations, reflecting the spirit of the season.

Key Ingredients & Their Roles
- Golden Oreos: The main flavor base; these provide a rich, creamy texture.
- Cream cheese: Binds the cookie crumbs together, adding creaminess and a slight tang.
- White candy coating: Ideal for a smooth, sweet exterior, perfect for decorating.
- Gel icing colors: Allow for endless embellishment and personalization of your eggs.
How to Make Easter Egg Oreo Cookie Balls
- Begin by placing the 14.3 oz package of Golden Oreos into a food processor. Pulse until transformed into fine crumbs, embracing that hypnotic sound of grinding cookies.
- In a mixing bowl, combine the Oreo crumbs with 8 oz of softened cream cheese. Mix until fully integrated. You should achieve a thick yet malleable dough, perfect for shaping.
- Using about 1 1/2 tablespoons per egg, shape the mixture into egg forms. This part is messy, but remember—fun is part of the process!
- Once shaped, chill the cookie eggs in the fridge for about one hour. This step is crucial for achieving a firmer structure before dipping.
- When the eggs are ready, melt 10 oz of white candy coating. Dip each egg, using a toothpick inserted at the bottom for easier handling. Allow any excess coating to drip off before placing on parchment paper.
- Once coated, you can fill in the toothpick hole with a dab of candy coating. Let the eggs set until dry. Afterward, use leftover melted coating combined with gel icing colors to creatively decorate your eggs.
- Store your gorgeous creations in the fridge for up to a week, making sure they’re in a sealed container so they stay fresh.
Pro Tips & Troubleshooting
- When mixing the cream cheese and cookies, ensure your cream cheese is adequately softened for easier blending.
- A common mistake is over or under-dipping the eggs. Make sure to shake off excess candy coating to prevent pooling at the bottom.
- For a fun twist, consider mixing in sprinkles or crushed candy into the Oreo mixture for added flavor and texture.
- If you want to double the recipe for a larger gathering, just keep the ingredient ratios consistent to maintain taste and texture.
Storage & Make-Ahead Guide
These Easter Egg Oreo Cookie Balls can be stored in the fridge for about a week in a sealed container. If you want to keep them longer, they can be frozen for up to three months. When I tried freezing, I found that they still maintained their texture quite well, making them a quick treat to pull out for unexpected guests.
What to Serve With Easter Egg Oreo Cookie Balls
These colorful treats pair wonderfully with a light spring salad or might be perfect alongside a cup of coffee or tea for a cozy treat. For more delightful recipes, try my Coconut Macaroons or for a heartier option, my Chicken Alfredo Lasagna.

Frequently Asked Questions
- How long do the Easter Egg Oreo Cookie Balls last? They stay fresh in the fridge for about a week.
- Can I use regular Oreos instead of Golden Oreos? Yes, regular Oreos will work, but the flavor and color of the egg will slightly differ.
- What’s the best way to store these cookie balls? Keep them in an airtight container in the refrigerator or freezer.
- Can I make these ahead of time? Absolutely! They’re great for prepping days in advance and storing until needed.
- Is there a way to make these healthier? Consider using reduced-fat cream cheese or dark chocolate for dipping.
Final Thoughts
Creating Easter Egg Oreo Cookie Balls is a joyful experience that transforms simple ingredients into a delightful treat. I love enjoying them fresh from the fridge, paired with a warm drink as we celebrate. I encourage you to try this recipe and share your outcomes—you might just create a new family tradition!
More Recipes You’ll Love
- Best Carrot Cake Cookies – a delightful dessert option
- Easy Easter Birds Nest Cookies – perfect for the Easter theme
- Easter Cake Pops – great for festive occasions

Easter Egg Oreo Cookie Balls
Ingredients
Main Ingredients
- 14.3 oz Golden Oreos crushed into crumbs
- 8 oz cream cheese room temperature
- 10 oz white candy coating
Decoration Ingredients
- 1 oz additional white candy coating per color, for decorating
- gel icing colors
Instructions
Main Ingredients
- Add the Golden Oreo cookies to a food processor or blender and crush into crumbs.14.3 oz Golden Oreos
- Mix the cream cheese and cookie crumbs together in a bowl until well combined. You should easily be able to form balls.
- Form Easter eggs from the cookie mixture using about 1 1/2 tablespoons per egg.
- Put the eggs in the fridge for about 1 hour to firm up a bit.
- Melt the 10 ounces of white candy coating and dip the chilled eggs into the melted candy coating. Set on parchment paper to dry.
Decoration Ingredients
- Once dry, add the decorations with gel icing colors. Pipe or drizzle the colors over the Oreo eggs.
Notes
They are a great thing to make with kids and can be enjoyed by all!